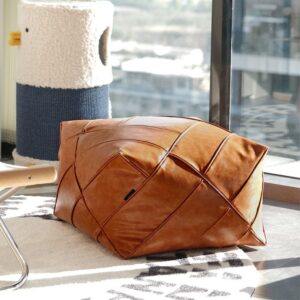
How Do You Make a Pouf Ottoman: DIY Guide
Are you wondering how to make a pouf ottoman that adds both comfort and style to your living space? Look no further! In this comprehensive DIY guide, I’ll walk you through the step-by-step process of creating your very own pouf ottoman. Let’s dive into the world of crafting and transform your home decor.
Wondering how do you make a pouf ottoman? Crafting a pouf ottoman is simpler than you might think! With just a few materials and some creativity, you can craft a beautiful and functional piece of furniture for your home. Let’s explore the process in detail.
1: Choose Your Fabric
One of the first steps in making a pouf ottoman is selecting the right fabric. Opt for durable materials like canvas or upholstery fabric that can withstand everyday use. Consider the color and texture of the fabric to ensure it complements your existing decor. By choosing the right fabric, you can create a pouf ottoman that seamlessly blends into your space.
2: Measure and Cut Fabric Panels
To create the body of the pouf ottoman, you’ll need to measure and cut fabric panels to the desired size. Use a measuring tape and fabric scissors to ensure accuracy in your measurements. Cut the fabric panels according to the dimensions you’ve determined, keeping in mind the height and circumference of the pouf ottoman. With precise measurements, you can create a pouf ottoman that fits perfectly in your space.
3: Sew Panels Together
Once you have cut the fabric panels, it’s time to sew them together to form the body of the pouf ottoman. Use a sewing machine or hand stitching to join the panels along the edges, leaving one side open for stuffing. Be sure to reinforce the seams with double stitching to ensure durability. Sewing the panels together is a crucial step in creating a sturdy and long-lasting pouf ottoman.
4: Stuff with Filling
With the fabric panels sewn together, it’s time to stuff the pouf ottoman with filling. You can use a variety of materials for stuffing, such as foam, polyester fiberfill, or even old fabric scraps. Pack the filling tightly into the pouf ottoman to create a firm and supportive structure. Adjust the amount of filling as needed to achieve your desired level of comfort and plushness.
5: Close and Secure
Once the pouf ottoman is fully stuffed, it’s time to close the opening and secure it in place. Use a strong needle and thread to sew the opening shut, ensuring that the stitches are tight and secure. Conceal the seam for a seamless finish, using a hidden stitch or decorative trim if desired. Closing and securing the pouf ottoman is the final step in completing your DIY project.
6: Add Embellishments (Optional)
To add a personal touch to your pouf ottoman, consider adding embellishments such as decorative buttons, tassels, or embroidery. These embellishments can enhance the visual appeal of your pouf ottoman and give it a unique and customized look. Get creative with your embellishments and let your personality shine through in your DIY creation.
Congratulations! You’ve successfully crafted your very own pouf ottoman from scratch. By following these step-by-step instructions, you’ve created a stylish and functional piece of furniture that adds both comfort and character to your living space. Whether you’re relaxing with a book or entertaining guests, your pouf ottoman is sure to be a versatile and beloved addition to your home decor.


